
Why Exterior Camera Installation Matters for Your Home Security
Exterior camera installation is one of the most effective ways to protect your home and family. Whether you’re monitoring your front door, driveway, or backyard, a well-placed camera system acts as both a deterrent to potential intruders and a reliable way to keep tabs on your property—even when you’re not there.
Quick Answer: Exterior camera installation involves four key steps:
- Plan Your Layout – Choose camera types, power sources, and optimal locations
- Install Hardware – Mount cameras securely at 8-10 feet, run and protect cables
- Connect Your System – Link cameras to your recorder or network, optimize views
- Maintain & Monitor – Clean lenses regularly, update firmware, test alerts
If you’re looking to improve your home’s overall safety, check out our guide on Security Camera Placement Tips. For professional help with a complete system, schedule your security camera installation with Stafford Home Service Inc.
Installing exterior cameras might seem intimidating at first—drilling into your home’s exterior, running cables, and configuring a network can feel overwhelming. But with the right plan and a clear understanding of the process, this DIY project is well within reach for most homeowners. You’ll gain peace of mind knowing you can see what’s happening around your property at any time, day or night.

Before You Begin: Planning Your Camera Layout
A successful exterior camera installation starts long before you pick up a drill. Think of this planning phase as creating a security blueprint for your home—it’s where you’ll make the most important decisions about what cameras to use, how to power them, and where they’ll do the most good. Taking time to plan now will save you from frustration later and ensure your system actually protects the areas that matter most.
Choosing the Right Camera for Your Needs
Walking into security cameras can feel overwhelming, but understanding a few basic types will help you make smart choices for your property.
Bullet cameras are the classic choice—you’ve probably seen their distinctive cylindrical shape on buildings around town. They’re excellent for keeping watch over long distances like driveways or the street in front of your home. Their obvious presence sends a clear message to anyone thinking about causing trouble: this property is protected.
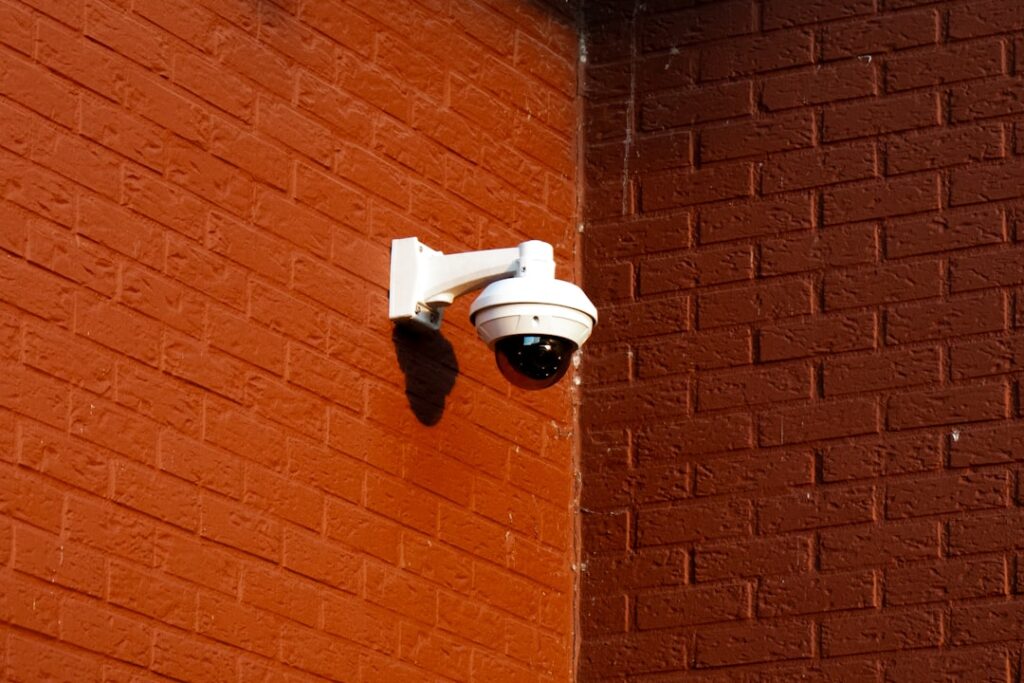
Dome cameras take a more subtle approach. Tucked inside their protective dome housing, they’re tougher to tamper with and blend in better with your home’s exterior. The dome design also shields them from harsh weather, and many can be adjusted inside the housing to cover different angles. They’re particularly versatile for general surveillance around entry points.
For larger properties or areas needing flexible coverage, PTZ (Pan-Tilt-Zoom) cameras offer remote control capabilities. You can move them left and right, up and down, and zoom in for a closer look—all from your phone or computer. While they cost more upfront, one PTZ camera can sometimes replace several fixed cameras, which might actually simplify your exterior camera installation.
Pay attention to each camera’s field of view as well. Some cameras capture a wide 180-degree panorama, perfect for monitoring your entire front yard. Others focus on a narrower but longer range, ideal for watching a driveway or pathway. Matching the camera type to what you need to see makes all the difference. Our guide on Security Camera Placement Tips can help you think through these decisions, and you’ll find more insights in our article about Security Cameras & Neighborhood Safety.
Selecting a Power Source
How your cameras get their power is just as important as where you put them. This decision affects both your installation process and long-term maintenance.
Wired cameras using PoE (Power over Ethernet) are the gold standard for reliability. With PoE, a single Ethernet cable delivers both power and data to your camera. No separate power adapter, no extra outlet needed—just one clean cable run. This approach is particularly smart if you’re already upgrading your home network or building new. It creates fewer points where something can go wrong, and your cameras stay connected even during power fluctuations.
Battery-powered cameras give you freedom to install anywhere without worrying about running cables through walls or finding nearby outlets. They’re perfect for renters, for monitoring remote corners of your property, or for temporary setups. Just remember you’ll need to recharge or replace batteries periodically—it’s a small trade-off for that installation flexibility.
Solar-powered cameras take battery power a step further by keeping themselves charged through a small solar panel. They’re ideal for gates, sheds, or other spots far from your home’s electrical system. Once installed, they’re essentially maintenance-free, working year-round without you climbing a ladder to swap batteries. If you’re interested in smart, energy-efficient home solutions, check out our guide on Home Automation for Energy Efficiency.
Finding the Best Camera Locations
Now comes the detective work—walking around your property to identify vulnerable spots and blind spots. Your front door absolutely needs coverage. It’s where most visitors approach, where packages get delivered, and where you want clear footage of anyone who comes calling. But don’t stop there.
Your back and side doors are actually more likely to be targeted by intruders who know they’re less visible from the street. Off-street windows—especially those hidden by landscaping or privacy fences—deserve attention too. Your driveway needs monitoring to capture anyone approaching by vehicle, and your garage (both the main door and any side entrances) is another common entry point worth protecting.
As you walk your property, imagine you’re trying to break in. Where would you approach from? What’s hidden from view? Look up at potential mounting spots and think about what each camera would actually see from that angle. Trees and shrubs that seem small now might grow to block your view in a year or two. The goal is eliminating blind spots while giving each camera a clear line of sight to the areas you care about most.
Essential Tools and Materials
Having everything you need before you start makes the installation process so much smoother. You’ll want a stable ladder tall enough to reach your mounting spots safely, along with safety glasses and work gloves for protection. Your electric drill with various drill bits (including a larger spade bit for cable holes) will be your workhorse, along with a good screwdriver set for mounting brackets.
Most cameras come with mounting templates to help you drill holes in exactly the right spots—don’t skip using these. You’ll need appropriate screws and wall anchors for your home’s exterior material, and fish tape makes running cables through walls much easier. For wiring work, grab wire strippers, cutters, electrical tape, and cable ties to keep everything neat.
Since you’re working outdoors, weatherproof junction boxes protect any connection points from rain and snow, while silicone sealant seals up holes where cables enter your home. A voltage tester and network cable tester help verify everything’s connected properly, and your smartphone or tablet will be essential for the initial camera setup and testing. Round out your toolkit with basics like a pencil, measuring tape, level, and utility knife, and you’re ready to go.
With your plan mapped out, cameras selected, and tools gathered, you’re prepared for a successful exterior camera installation. The next step is getting those cameras mounted and connected.
The Step-by-Step Exterior Camera Installation Process
Now that we’ve planned our camera layout and gathered our tools, it’s time for the hands-on part of exterior camera installation. This is where your planning pays off—mounting cameras securely, running cables safely, and making sure everything can stand up to whatever Mother Nature throws at it. Before we climb that ladder, let’s talk safety. We’re working at height, often near electrical sources, so take your time and don’t rush. For a broader look at the installation process, our Installing Security Cameras page offers helpful context.

Mounting Your Cameras Securely
Getting your cameras mounted properly makes all the difference between a system that works beautifully and one that disappoints. We’re aiming for that sweet spot where the camera captures clear details while staying out of reach from anyone with bad intentions.
The ideal mounting height is between 8 and 10 feet. This puts your camera high enough to discourage tampering—someone would need a ladder to reach it—but low enough to capture facial features and other important details. Some professionals even recommend going a bit higher than 10 feet if vandalism is a serious concern in your area, though you’ll want to balance that with image quality.
Mounting under eaves or overhangs is one of the smartest moves you can make. This natural shelter protects your camera from direct rain, snow, and the harsh afternoon sun. We’ve seen cameras last years longer when they’re tucked under an eave rather than fully exposed to the elements. Plus, it helps prevent glare and water spots on the lens that can ruin your footage.
Most cameras come with a mounting template, and we strongly recommend using it. This paper guide shows exactly where to drill, taking the guesswork out of alignment. Mark your spots with a pencil, then drill pilot holes—these smaller starter holes prevent your screws from splitting wood or cracking stucco. If you’re mounting to brick or concrete, switch to a masonry bit and use proper wall anchors. The few extra minutes spent drilling pilot holes pays off with a rock-solid mount that won’t come loose over time.
Running and Protecting Camera Cables
Once your cameras are mounted, we need to get power and data to them—and we want to do it in a way that looks professional and protects those cables from damage. Exposed wires are an eyesore, a weathering risk, and an invitation for someone to cut them.
The best approach is concealing wires inside your home’s structure. Running cables through soffits, attics, or inside walls keeps them completely hidden and protected. This is where fish tape becomes your best friend—this flexible tool helps you steer through tight spaces and pull cables where you can’t reach directly. Yes, it takes more effort than surface-mounting, but the clean look and security are worth it.
Sometimes running cables internally just isn’t practical, and that’s okay. When cables must be exposed, we protect them with conduit. Metal conduit—either rigid or flexible—creates a physical barrier that’s extremely difficult to cut through. It also shields the cables from UV damage, temperature swings, and physical impacts. This is especially important for any cable runs within reach from the ground.
Every outdoor connection needs proper weatherproofing. If you’re using a junction box outside, make sure it’s rated for outdoor use and seal every connection point. We use silicone sealant or weatherproof tape to keep moisture out—water is the enemy of electrical connections. Even a small amount of moisture can cause shorts, corrosion, and system failures down the road.
Don’t forget about sealing wall penetrations where cables enter your home. Any hole we drill through your exterior wall needs to be filled with outdoor-grade caulk once the cable is through. This keeps out water, prevents drafts, and stops insects from finding a new way inside. It’s a small detail that protects both your camera system and your home’s comfort.
Key Considerations for Your Exterior Camera Installation
Beyond the mechanics of mounting and wiring, a few other factors separate a good installation from a great one. These considerations ensure your system performs reliably year-round, especially in our challenging Minnesota climate.
Look for cameras with an IP65 rating or higher. That IP number tells you how well the camera is protected against dust and water. IP65 means the camera is dust-tight and can handle water jets from any direction—perfect for our Midwest weather. If you want even more protection, IP67-rated cameras can handle temporary submersion in water. These ratings aren’t just marketing speak; they’re standardized tests that tell you exactly what conditions your camera can survive.
Vandal-proofing matters more than many people realize. Beyond mounting height, some cameras come with IK impact ratings that show how well they resist physical damage. Dome cameras naturally offer better vandal resistance than bullet cameras because their housing protects the lens and mounting hardware. If you’re installing in an area where tampering is a concern, this extra protection gives you peace of mind.
Your local climate should guide your camera selection. Here in Minnesota, we need cameras that can handle everything from below-zero winter nights to hot, humid summer days. Temperature swings and moisture can wreak havoc on electronics that aren’t designed for it. We always choose cameras built for extreme conditions, with operating ranges that cover our weather reality. Our guide on 5 Tips for Summer Home Security touches on why robust outdoor equipment matters year-round.
Getting Connected: Network and System Setup
With your cameras physically installed and wired, the next phase of your exterior camera installation involves bringing them to life by connecting them to your network and recording system. This is where the magic of remote monitoring and event recording happens—you’ll finally be able to see what’s happening around your property from anywhere, at any time. A well-configured system ensures you have reliable access to your footage and alerts, turning those mounted cameras into a truly functional security solution. Our Home Security Gallery showcases examples of integrated systems that bring everything together beautifully.

Connecting to Your Network and Recorder
The heart of your surveillance system is its connection to your network and recording device. This is what transforms individual cameras into a cohesive security system.
First, let’s talk about recorders. You’ll typically choose between a DVR (Digital Video Recorder) or an NVR (Network Video Recorder). DVRs work with analog cameras, receiving analog signals and converting them to digital recordings. They’re generally simpler and work well for basic setups. NVRs, on the other hand, pair with IP cameras—those smart cameras that process video digitally right at the source. IP cameras transmit digital streams over your network, often using PoE cables. NVRs support higher resolutions and more advanced features, making them the preferred choice for modern installations.
If you’ve installed PoE cameras, the connection process is wonderfully straightforward. Each camera connects to a PoE switch using a single Ethernet cable—that’s it. The PoE switch then connects to your router, creating a neat network where power and data flow through the same cable. It’s one of the reasons we love PoE systems for exterior camera installation; they’re clean, reliable, and minimize potential points of failure.
For those who’ve chosen wireless cameras, your Wi-Fi signal strength becomes absolutely critical. A weak signal can cause dropped connections, laggy video, or missed recordings—exactly what you don’t want when you need footage most. We always recommend checking the Wi-Fi signal at each camera location before finalizing the installation. If you’re getting spotty coverage, a Wi-Fi extender can work wonders, or you might consider repositioning your router to better cover your outdoor areas.
Once everything’s physically connected, you’ll use the manufacturer’s mobile app or desktop software to find your cameras on the network. This initial setup typically involves assigning passwords, naming each camera by location (like “Front Door” or “Driveway”), and configuring basic recording settings. It’s also a great time to explore features like motion detection zones and alert notifications. For more on smart home connectivity and how modern security systems integrate with your lifestyle, check out Interactive Home Security: Bring Home the Future.
Optimizing the Field of View and Image Quality
Even the best cameras are useless if they’re not aimed correctly. This fine-tuning phase can make the difference between a system that’s merely present and one that’s truly effective.
Start by aiming each camera to cover your intended area completely. Pull up the live feed on your phone or monitor and make adjustments while watching. For bullet cameras, you’ll manually adjust the mounting bracket. Dome cameras let you reposition the lens inside the protective dome. PTZ cameras offer the most flexibility since you can remotely control their position—panning, tilting, and zooming until you’ve got the perfect view.
As you adjust, keep an eye out for obstructions. Tree branches are notorious for growing into camera views over time, but even fixed objects like downspouts, light fixtures, or architectural features can create blind spots or unwanted shadows. A slight angle adjustment now can save you from missing important footage later.
Glare is one of the most common image quality problems we see, and it’s entirely preventable with proper aiming. Avoid pointing cameras directly into the sun’s path—that means being careful with east-facing cameras in the morning and west-facing ones in the afternoon. Similarly, porch lights and streetlights can overexpose your image, washing out important details. Many modern cameras feature Wide Dynamic Range (WDR) to help balance challenging lighting, but proper positioning is always your first and best defense.
Finally, don’t skip testing your night vision. Once darkness falls, review the footage from each camera. Most modern cameras use infrared (IR) LEDs to see in complete darkness, producing clear black-and-white images. Some advanced models use spotlights or sensitive sensors for color night vision. Watch for IR reflection—if your infrared illuminators are bouncing off a nearby window, white wall, or other reflective surface, you’ll get a washed-out, useless image. A small adjustment to the camera angle usually fixes this right up, and you’ll be amazed at the clarity you can achieve even in pitch darkness.
After the Install: Maintenance, Privacy, and Professional Help
Congratulations! Your exterior camera installation is complete, and you now have eyes on your property 24/7. But before you sit back and relax, let’s talk about keeping your system running smoothly for the long haul. A well-maintained camera system, combined with an understanding of privacy rules and when to call in the pros, ensures you get the most value from your investment.
For more guidance on creating a comprehensive security approach, explore our resource on What to Look For in a Home Security System.
Maintaining Your Exterior Cameras for Peak Performance
Think of your cameras like any other part of your home—they need a little TLC to keep performing their best. Regularly cleaning the lenses is probably the easiest and most impactful maintenance task you can do. Dust, pollen, spiderwebs, and even the occasional bird dropping can blur your footage. Every few months, take a soft, damp cloth and gently wipe down each lens. You’ll be amazed at the difference it makes.
Beyond cleaning, we recommend checking for loose connections at least twice a year. Weather, wind, and even minor vibrations can gradually loosen cables or mounting screws. A quick visual inspection and a gentle tug on cables can catch problems before they cause a system failure.
Updating camera firmware might sound technical, but most modern systems make it easy through their mobile apps. Manufacturers release these updates to fix bugs, improve performance, and patch security vulnerabilities. Keeping your firmware current is one of the best ways to protect your system from hackers.
Finally, don’t forget to test your motion alerts periodically. Walk in front of each camera and make sure you receive a notification on your phone and that the recording is triggered. This simple test confirms your system is actively watching, not just sitting idle.
Understanding Legal and Privacy Rules
Installing security cameras on your property is your right, but it comes with responsibilities. The most important principle is respecting your neighbor’s privacy. While your camera might unavoidably catch a sliver of a neighbor’s driveway or the public sidewalk, we avoid pointing cameras directly into anyone’s private spaces like bedroom windows or backyards. A little consideration here goes a long way toward maintaining good relationships.
Recording audio is where things get legally tricky. In many states and provinces, recording conversations without consent is illegal, even on your own property. Most homeowners stick with video-only recording to stay on the safe side. Always check your local regulations before enabling audio features.
Understanding the difference between monitoring public versus private property is also key. You generally have more freedom to record what’s visible from public spaces, but the expectation of privacy increases dramatically on private property. Focus your cameras on your own property boundaries and entry points to stay within legal bounds.
DIY vs. Professional Exterior Camera Installation
The decision to tackle exterior camera installation yourself or bring in professionals often comes down to your comfort level, the complexity of your setup, and how much time you have. Let’s break down what each approach offers:
| Feature | DIY Installation | Professional Installation (Stafford Home Service Inc.) |
|---|---|---|
| Time | Can take a full weekend or more, especially if you’re learning as you go | Completed in a few hours by experienced technicians |
| Expertise | Requires research and troubleshooting; mistakes can compromise security | Backed by years of experience and knowledge of local building codes |
| Customization | Full control over camera placement and system choices | Expert recommendations based on your property’s unique vulnerabilities |
| Safety | Risk of ladder accidents and electrical hazards, especially with wired systems | Professionals handle all safety concerns, including working at heights and electrical connections |
When to DIY: If you’re comfortable with basic tools, have a simple setup with just a few wireless cameras, and enjoy learning new skills, DIY can be rewarding. It’s a great weekend project if you have the time and patience.
When to call a professional: Complex installations involving multiple wired cameras, running cables through walls or attics, integrating with existing home automation systems, or any situation involving electrical work beyond plugging in a power adapter—these are all good reasons to bring in the experts. Safety is paramount, especially when working on ladders or dealing with electrical systems.
At Stafford Home Service Inc., we’ve installed countless security systems across Minnesota. Our experienced team understands local weather challenges, building codes, and the best practices for creating a reliable, effective surveillance system. We take pride in quality workmanship and ensuring complete customer satisfaction. For more insights into comprehensive home protection, check out our guide on Enhancing Your Home Security.
A professionally installed system means you can trust that every camera is optimally placed, every cable is properly protected, and your entire system is configured correctly from day one. That peace of mind is invaluable when it comes to protecting your home and family.