No Wires, No Stress: Your Easy Guide to Installing Security Cameras
No Wires, No Stress: Learn easy DIY tips for mounting security cameras. Protect your home with our guide on placement, mounts, and installation.
Why Mounting Security Cameras the Right Way Matters
Mounting security cameras is a smart step to protect your home. Whether you're worried about break-ins, monitoring packages, or want peace of mind, the right camera placement is key. Most security cameras today are designed for DIY installation, but choosing the wrong mount or location can leave you with blind spots, poor footage, or a camera that falls off your wall.
Quick Answer: How to Mount Security Cameras
- Choose your mount type - Screw-in mounts offer the best security, while magnetic and adhesive mounts work for renters or temporary setups
- Pick strategic locations - Focus on entry points like front doors, back doors, and ground-floor windows
- Mount at the right height - Install cameras 8-10 feet off the ground, angled slightly downward
- Avoid common mistakes - Don't point cameras at direct sunlight, neighbor's property, or install in bedrooms/bathrooms
- Secure your installation - Use proper anchors for your surface type and weatherproof all outdoor connections
Roughly 34% of burglars enter through the front door, which is why camera placement at entry points is so critical. It's not just about deterring crime—it's about doing it right the first time to avoid redrilling holes or dealing with cameras that don't capture what you need.
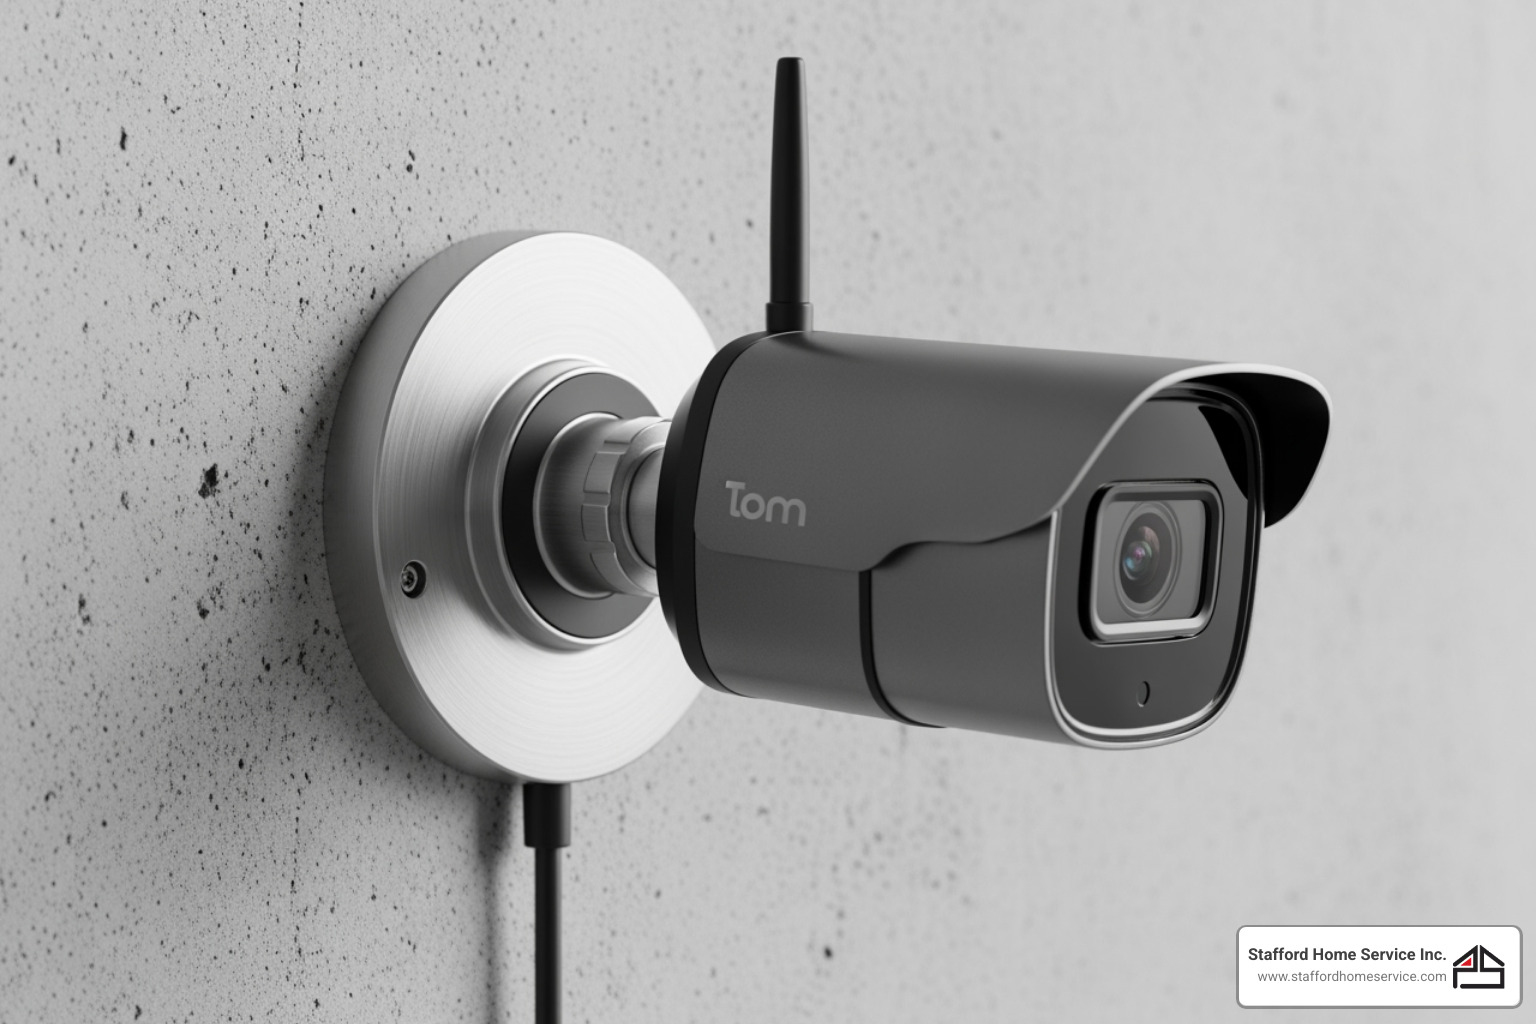
Choosing the Right Mount and Camera for Your Home
Choosing the right mount is as important as picking the camera. A wobbly or poorly placed mount renders even the best camera useless. Key factors to consider are mount materials, tamper resistance, camera compatibility, and weatherproofing for outdoor models (look for an IP66 rating or higher).
Here's a quick comparison of common mount types:
Mount TypeSecurityEase of InstallationBest Use CaseScrew-inHighMediumPermanent outdoor/indoor installations needing maximum stability and tamper resistance.MagneticMediumHighFlexible indoor/outdoor, temporary setups, easy camera adjustment/removal.AdhesiveLowHighLightweight indoor cameras, temporary placement, smooth surfaces.ShelfMediumHighIndoor cameras near outlets, battery-powered wireless cameras for flexible placement.
Screw-in and Wired-in Mounts: The Most Secure Option
For long-term security, screw-in mounts are the most reliable.
- Pros: They offer high security, making them difficult to tamper with. They are also durable against harsh weather and provide a stable, permanent solution.
- Cons: Installation is more difficult, requiring drilling. They are less flexible if you need to move the camera and risk damaging your home's exterior if not installed correctly.
Wired-in mounts often pair with screw-in types, especially for cameras needing constant power like floodlight or Power over Ethernet (PoE) models. PoE is convenient, using one Ethernet cable for power and data. This often involves running the cable to a junction box. Many popular cameras, like certain Google Nest options and Tapo cams, use secure screw-in bases.
No-Drill Solutions: Magnetic, Adhesive, and Shelf Mounts
If you want to avoid drilling, no-drill options make mounting security cameras easier.
Magnetic mounts are a favorite for convenience.
- Pros: Easy adjustment and removal, perfect for charging battery-powered cameras like the Ring Outdoor Cam Plus. They are versatile for temporary setups and cause minimal damage.
- Cons: Less secure than screw-in mounts, surface-dependent (require metal), and have weight limitations.
Many homeowners love the flexibility of options like custom Arlo magnetic mounts.
Adhesive mounts are the ultimate no-drill solution but have drawbacks.
- Pros: No drilling required and quick peel-and-stick installation.
- Cons: Significant weight limitations, strict surface requirements (smooth, flat, clean), and durability concerns. Adhesives can fail over time due to weather, making them unreliable for most security cameras, especially outdoors.
Using non-drilling methods on brick surfaces is risky. Brick is porous and uneven, preventing a strong adhesive bond. Weather degrades the adhesive, risking camera failure. These methods are only suitable for very lightweight cameras, with a high risk of failure.
Shelf mounts are handy for indoor use.
- Pros (Indoor): Easy setup near an outlet, portable, and require no installation.
- Cons (Indoor): Placement is dependent on outlet and shelf location, may offer limited coverage, and can be knocked over.
- Pros (Outdoor/Battery-Powered): Flexible placement without outlets, easy repositioning, and a clean, wire-free look.
- Cons (Outdoor/Battery-Powered): Requires battery recharging, less secure, and less stable in high winds.
Specialty Mounts: Light Bulb Sockets and Solar Panels
Specialty mounts offer clever solutions for unique spots.
Light bulb mounts screw into existing light sockets.
- Pros: Discreet and use existing power.
- Cons: Placement is limited to light socket locations, you lose a light source, and camera quality can be a concern. They are often the least favored option.
Solar panel add-ons are a game-changer for wireless outdoor cameras, providing continuous power. They convert sunlight into electricity to keep the camera's battery charged. For best results, you need optimal solar placement in a sunny spot.
- Pros: Continuous, eco-friendly power and the convenience of no battery changes.
- Cons: Placement is dependent on sunlight, requires extra installation, and effectiveness varies with climate and shade.
When installing a solar panel, angle it to capture maximum direct sunlight. You can find helpful installation guides from manufacturers like Ring.
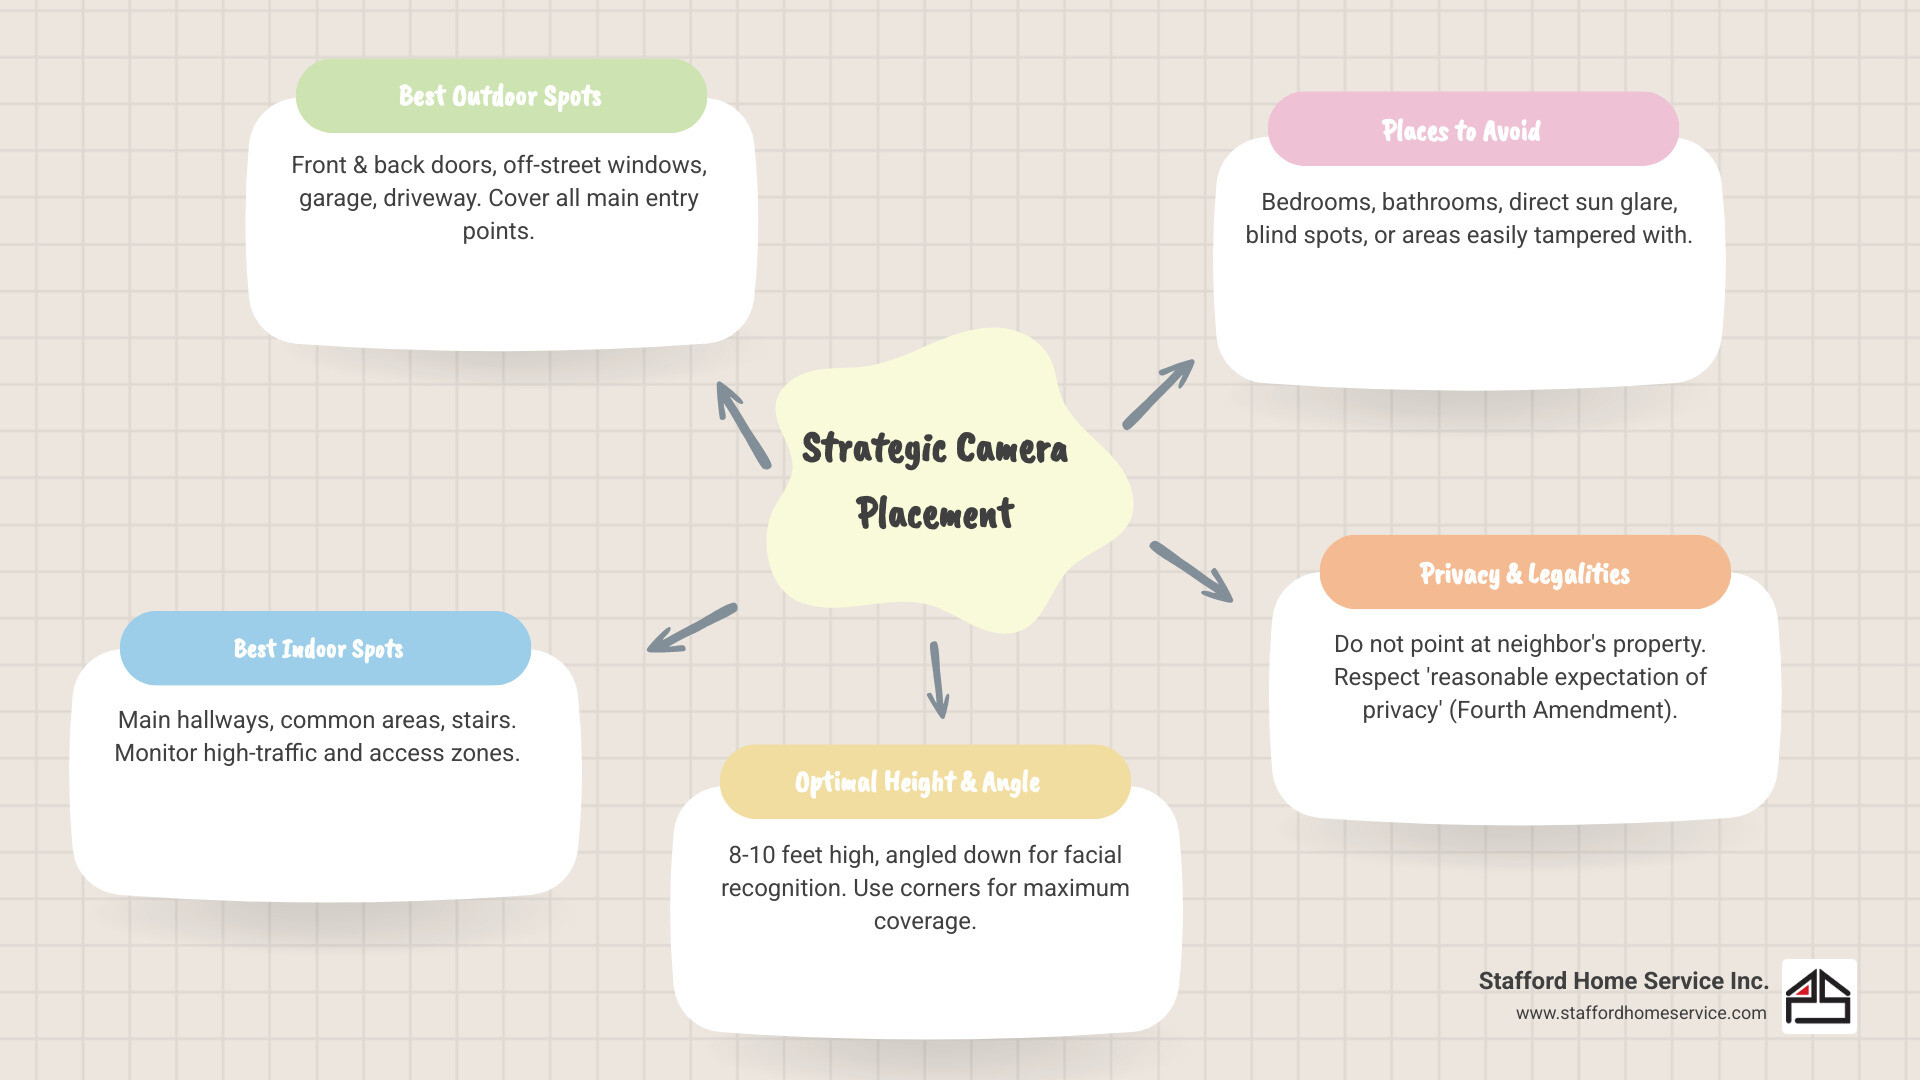
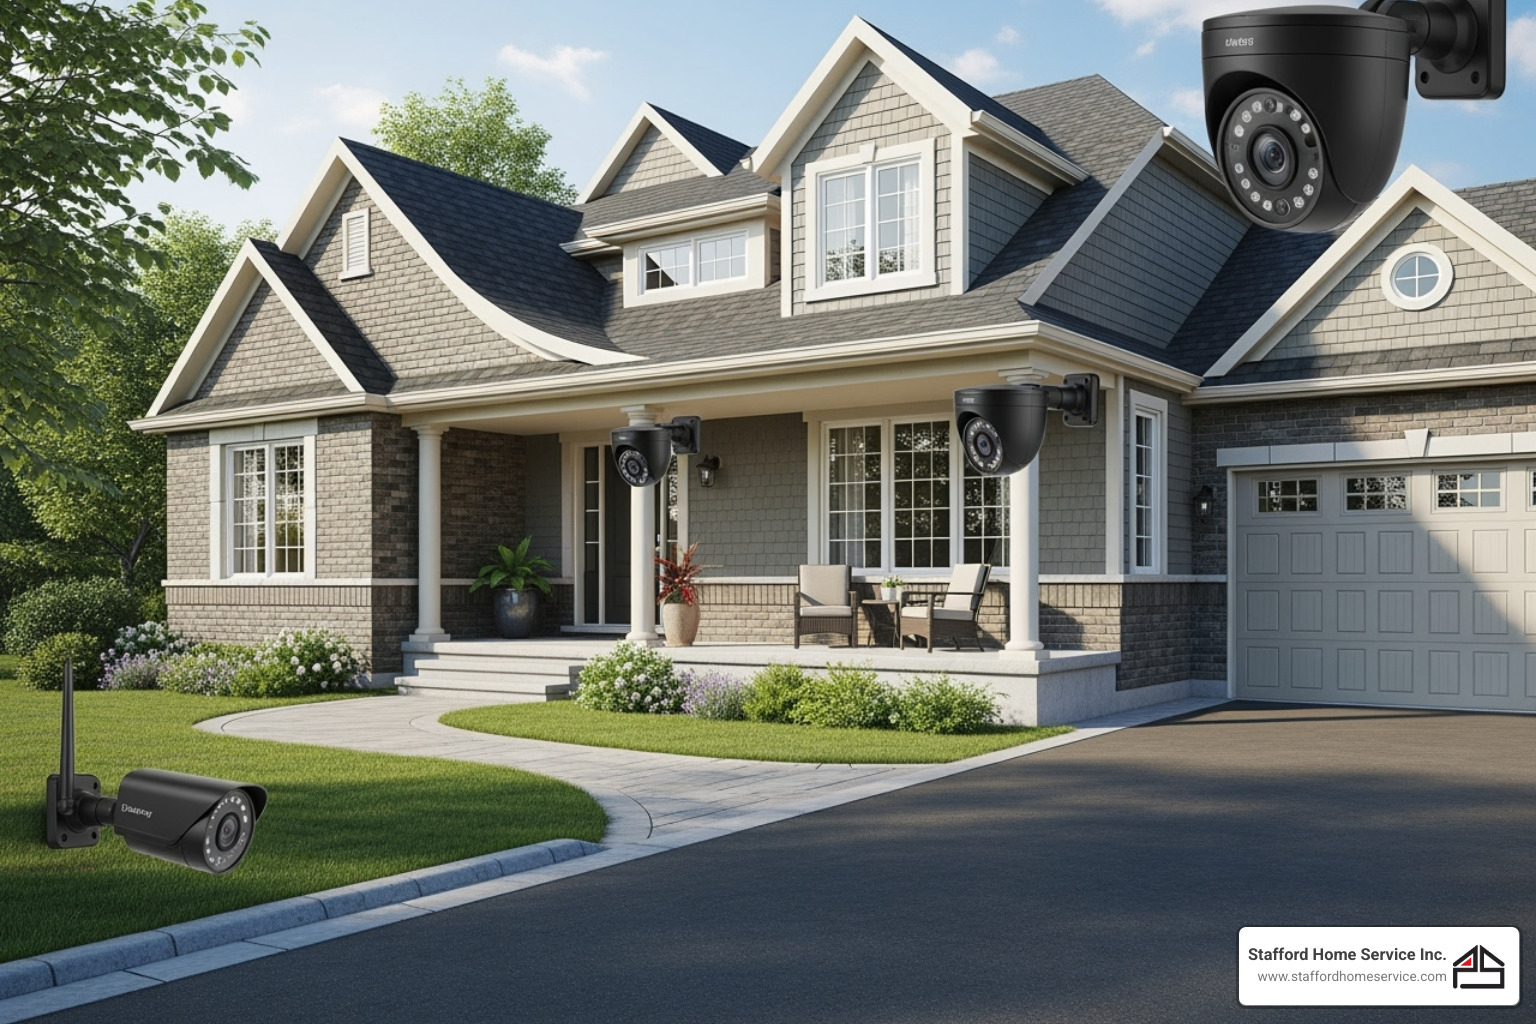
Strategic Camera Placement: Where to Install and What to Avoid
The best camera is useless if it's pointed in the wrong direction. Mounting security cameras in the right spots is what makes a security system effective. Think like a burglar: where are the points of entry?
Best Outdoor Locations
Your outdoor cameras are your first line of defense.
- Front Door: This is your top priority, as it's a common entry point. A camera here monitors deliveries, visitors, and intruders. Position it to capture faces clearly.
- Back and Side Doors: These are often overlooked and less visible, making them attractive targets.
- Off-Street Windows: Cover any ground-floor windows that aren't easily visible from the street.
- Garage and Driveway: Garages contain valuables, and a driveway camera monitors vehicles and anyone approaching your home.
- Perimeter Fence Lines and Gates: A camera here provides an early warning before someone reaches your house.
Best Indoor Locations
Indoor cameras add another layer of protection.
- Main Hallways and Stairways: These are natural chokepoints that capture movement throughout the home.
- Common Areas: Living rooms and kitchens are good spots, especially if they contain valuables.
- Basement and Second-Floor Hallways: Cover access points to areas where you store important items.
Places to Avoid and Legal Considerations
Some camera locations are bad ideas or even illegal.
- Bedrooms and Bathrooms: Never install cameras in these private spaces. It's a violation of the reasonable expectation of privacy and can have legal consequences.
- Neighbor's Property: Aim cameras only at your own property. The Fourth Amendment protects privacy, and cases like Kyllo vs. the United States have established that surveilling private property can be illegal. Avoid capturing your neighbor's windows or yard.
- Direct Sunlight: This can blind your camera, resulting in useless footage. Position cameras away from direct sun or use models with High Dynamic Range (HDR).
- Blind Spots: Every camera has a limited field of view. Plan carefully to avoid gaps in coverage. Test your view before finalizing installation.
Best Practices for Angling and Positioning Your Cameras
Technical details ensure you capture useful footage.
- Height: Mount cameras at 8-10 feet. This is high enough to prevent tampering but low enough to capture clear facial images.
- Angle: Tilt the lens slightly downward to capture faces, which is crucial for identification.
- Corners: Corner mounts are effective, allowing one camera to cover two directions and maximize coverage.
- Testing: Always test your camera's live view via its app before permanently mounting it. Check for blind spots and lighting issues at different times of day.
- Camera Type: Consider wide-angle cameras (180-degree or 360-degree) to cover larger areas. PTZ (pan-tilt-zoom) cameras offer flexibility to remotely adjust the view and zoom in on details. These options help eliminate blind spots with fewer cameras.
A Step-by-Step Guide to Mounting Security Cameras
Ready to install? This guide will walk you through a typical DIY installation for a secure and effective setup.

The Basics of Mounting Security Cameras with Screws
Most modern cameras are designed for DIY installation.
For wood surfaces, the process is straightforward. Use the included mounting template to mark screw locations. Drill pilot holes (a 5/64 drill bit works well) to prevent the wood from splitting. If running cables, drill a larger hole (1/2in to 1in) for the wires. Align the camera base and secure the camera with the supplied screws, using hand tools to avoid overtightening. For wired cameras, run the cable through the mount and use weatherproof connectors.
For brick or stucco, use the mounting template to mark your drill points. Use a power drill with a 7/32 inch (5.5 mm) masonry bit. Gently tap the included wall anchors into the holes until they are flush. Align the mount and screw the camera securely into the anchors. For outdoor installations, it's crucial to weatherproof all cable connections, often using a junction box.
No matter the surface, always use a small level to ensure a level installation. A crooked camera can affect motion detection accuracy.
Tips for Securely Mounting Security Cameras Outdoors
Outdoor cameras face harsh conditions, so take these extra steps.
- Mount under eaves: Whenever possible, mount cameras under eaves or overhangs for natural protection from rain, snow, and direct sun. This extends the camera's life and improves image quality.
- Use junction boxes: For a clean and tamper-resistant setup, use junction boxes to protect wiring from weather and tampering. LTS provide various mounting brackets and accessories that can help.
- Secure wires: Run cables through conduits or the camera mount itself. If wires must be exposed, use wire protection covers.
- Check Wi-Fi signal: For wireless cameras, test the Wi-Fi signal at the mounting location before you drill. A weak signal leads to poor performance.
- Ensure durability: Look for mounts and cameras with an IP rating of IP66 or IP67. Robust materials like galvanized steel prevent corrosion. Always check for camera compatibility with your model. An accessory selector like the one Axis Communications offers can be helpful. SP Security Cameras also offers a range of mounts and housing for outdoor conditions.
Advanced Tips: DIY Hacks and Professional Help
Sometimes the best camera placement isn't a traditional spot. A little creativity can help you mount cameras discreetly while maintaining great coverage.
DIY Security Camera Mounting Hacks
The key is to make the camera look natural.
- Birdhouse Camera: Hide a mini camera inside a birdhouse, ensuring the lens has an unobstructed view.
- Faux Outdoor Fixtures: Integrate cameras into fake outdoor lights or decorative columns near entryways.
- Hollowed-out Tree Trunks: For a rustic look, seal a camera inside a hollow log in your garden.
- Weatherproof Planters: Embed a camera within a decorative planter box on a fence post or wall.
- Fishing Rod Holders: On a covered patio, these provide quick, adjustable mounting points on beams or posts.
- Indoor Disguises: Hide mini cameras in plant pots, wall clocks, or even decorative smoke detectors. The goal is to make cameras less obvious to potential intruders.
When is Professional Installation Recommended?
While DIY is rewarding, some jobs are best left to experts to ensure your system works flawlessly.
- Complex Wiring: If your system needs new electrical lines, outlets, or integration with existing wiring, a professional is essential. At Stafford Heating, Cooling, Plumbing & Electrical, we handle these installations safely, just as we would with any residential electrical service.
- Difficult Surfaces: Mounting on fiber cement, delicate stucco, or brick requires the right technique to avoid damage. We can ensure a secure installation without compromising your home's structure.
- Multi-camera Systems: Professionals can optimize placement for complex systems with multiple cameras and a network video recorder, eliminating blind spots and running wiring efficiently.
- Code Compliance: Electrical and exterior work must often meet local building codes. Our experienced owners understand these regulations, ensuring your installation is safe and compliant.
- Safety: If you're uncomfortable with power tools, ladders, or electrical work, call a professional. Your safety is paramount. Our quality workmanship and satisfaction guarantee mean the job is done right.
For expert electrical services and secure camera installation, explore our security camera solutions. We're here to ensure your home is safe.
Frequently Asked Questions about Security Camera Installation
How high should I mount my security camera?
The ideal height for mounting security cameras is 8-10 feet (2.5-3 meters) off the ground. This is high enough to prevent tampering but low enough to capture clear facial details for identification. Mounting too low makes the camera vulnerable, while mounting too high only captures the tops of heads. Always angle the camera slightly downward to capture faces.
Can I mount a security camera without drilling?
Yes, several no-drill options work for lightweight, wireless cameras. Magnetic mounts are flexible, heavy-duty adhesive mounts work on smooth surfaces, and clip-clamp mounts can attach to gutters or railings. You can also use shelf mounts indoors. However, these methods are less reliable and secure than screw-in installations, especially for permanent outdoor use. Adhesives can weaken in the weather, and magnetic mounts are easier to remove.
Do I need to worry about my neighbor's privacy?
Yes, this is a critical legal and ethical consideration. You must respect your neighbors' reasonable expectation of privacy. It is often illegal to record private areas like bedrooms, bathrooms, or a neighbor's backyard. When mounting security cameras, aim them only at your own property. The Fourth Amendment protects privacy, and recording your neighbor's private spaces can lead to legal trouble. Be mindful of property lines and, when in doubt, have a friendly conversation with your neighbor about your plans.
Secure Your Home with Confidence
We've covered everything from choosing the right mount to finding the best camera spots. A successful security system depends on two things: the right hardware and strategic placement. A proper installation ensures your cameras are secure, reliable, and ready to capture what you need, when you need it.
While many modern cameras are designed for DIY installation, some jobs require professional expertise. If your project involves complex electrical work, new outlets, or mounting on difficult surfaces, a professional installation ensures safety and peace of mind. It's not just about getting the camera on the wall; it's about a secure, compliant, and reliable setup.
That's where we come in. At Stafford Heating, Cooling, Plumbing & Electrical, we pride ourselves on quality workmanship and customer satisfaction. Our experienced team handles all residential electrical services, including security camera setups, with the dedication your home's safety deserves.
Ready to take the next step toward a more secure home? For expert electrical services and secure camera installation, explore our security camera solutions. We're here to help you protect what matters most.
Customer Testimonials
Our customers consistently praise our knowledgeable technicians, prompt service, and the lasting quality of the work we deliver.