Why Ceiling Fan Installation is Your Key to Year-Round Home Comfort
Ceiling fan installation is a rewarding DIY project that improves air circulation, cuts energy costs, and improves home comfort year-round. A properly installed ceiling fan allows your thermostat to work less, making you feel more comfortable in any season.
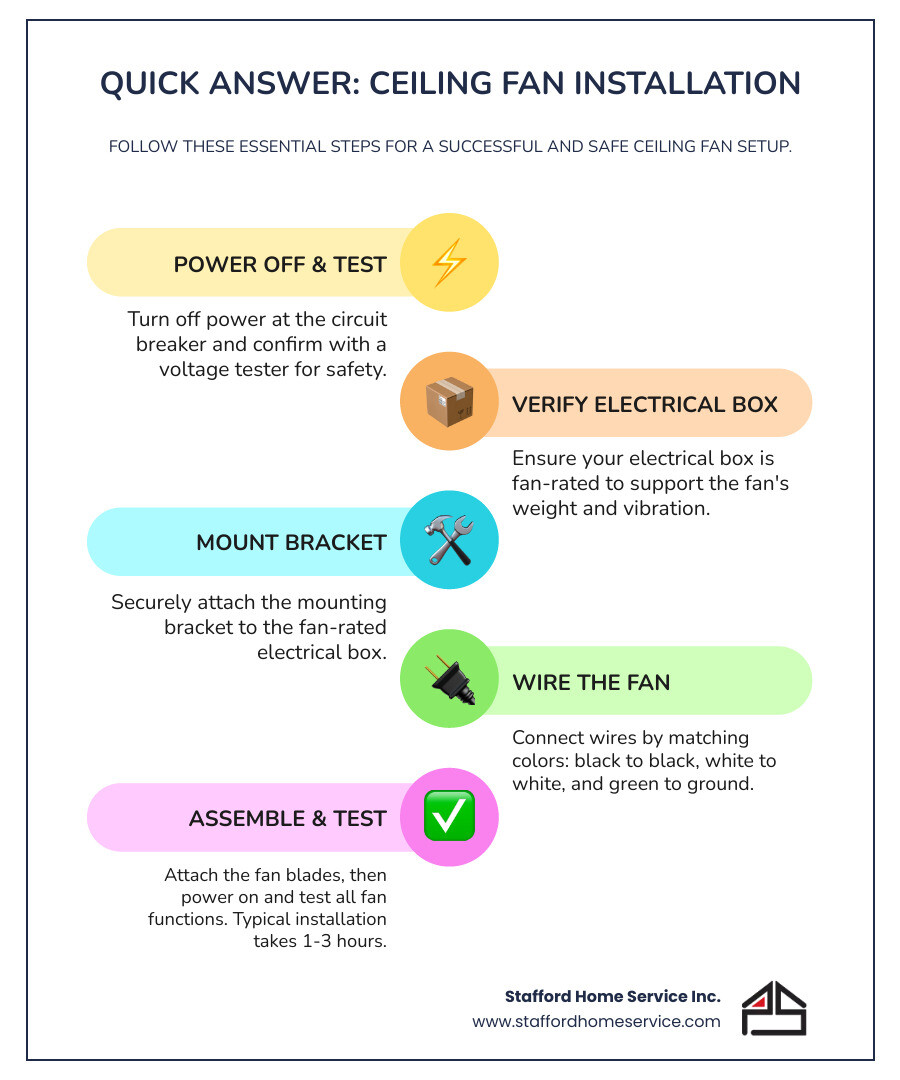
Quick Answer for Ceiling Fan Installation:
- Turn off power at the circuit breaker and confirm with a voltage tester.
- Check your electrical box—it must be fan-rated to support the weight.
- Mount the bracket securely to the electrical box.
- Wire the fan by matching colors (black to black, white to white, green to ground).
- Attach blades and test—typical installation takes 1-3 hours.
The best part? Today’s ceiling fans are stylish, functional, and energy-efficient, making them a smart upgrade for any room. However, the foundation of any successful installation is the electrical box. Standard light fixture boxes are not designed to handle a fan’s weight or vibration.
This guide walks you through every step, from choosing the right fan to troubleshooting common issues. We’ll cover safety basics, how to upgrade your electrical box, and how to avoid mistakes that lead to wobbling or humming.
Remember: while ceiling fan installation is a doable project for most homeowners, there’s no shame in calling a professional electrician if you encounter complex wiring or feel unsure about any step.
Before You Begin: Planning Your Ceiling Fan Project
Proper planning is key to a successful and safe ceiling fan installation. A little preparation now saves you from headaches and potentially dangerous situations later. Most installation problems arise from skipping this crucial phase.
Essential Safety Precautions
Electrical work requires caution, but with the right safety steps, this is a manageable DIY project.
Turn off the power at your circuit breaker first. Don’t just rely on the wall switch; head to your electrical panel and flip the breaker to “off.” Power can still flow to the fixture even if the wall switch is off.
Next, use a voltage tester to double-check the wires. These devices confirm if electricity is still flowing. No light or beep means the power is safely off.
Practice good ladder safety when working overhead. Position your ladder so you can reach comfortably without stretching. If you’re leaning, move the ladder.
Get a helper if you can. Ceiling fans are heavy, and an extra pair of hands is invaluable for holding the motor housing while you connect wires.
For a more detailed walkthrough, our friends at DIY Craftsy have put together a great guide on How to Install a Ceiling Fan Yourself.
Here’s what you’ll need to gather before you start:
- Tools: Sturdy ladder, screwdriver set, wire strippers, voltage tester, pliers, adjustable wrench, electric drill with bits, and safety glasses
- Materials: Your ceiling fan kit (with mounting hardware), wire nuts, fan-rated electrical box (if needed), and possibly a downrod extension for higher ceilings
Check that all parts are included with your fan before you begin.
Choosing the Right Fan for Your Space
Picking the right fan is crucial for comfort and performance. A fan that’s too small won’t be effective, while one that’s too large can be overwhelming.
Room size matters. To find the ideal blade span in inches, divide your room’s square footage by four. For example, a 200-square-foot room needs a 50-inch fan.
Ceiling height determines the fan type. For standard 8-9 foot ceilings, the included downrod usually works well. For safety and optimal airflow, blades should be at least 7 feet from the floor and ideally 8-9 feet.
For ceilings under 8 feet, use a low-profile or flush-mount fan. For ceilings over 9 feet, you’ll need an extended downrod to bring the fan to the optimal height.
Sloped ceilings are manageable. Many fans include angled mounting hardware or can be fitted with adapter kits. Check the fan’s maximum angle, which is typically around 30-34 degrees.
Consider smart features and lighting options. Today’s fans may offer voice commands or integrated lights. For porches or patios, choose an outdoor-rated fan designed to withstand humidity.
For more ideas on how lighting can transform your space, check out this helpful resource on indoor and outdoor lighting design.
Taking the time to plan now will ensure your ceiling fan installation goes smoothly.
Preparing the Foundation: The Electrical Box
The electrical box is the foundation of your ceiling fan installation, providing both the electrical connection and crucial structural support.
Many DIYers are surprised to learn that not all electrical boxes are created equal. A standard box for a light fixture cannot support the weight and vibration of a ceiling fan. A light fixture may weigh 5-10 pounds, but a fan can weigh 50 pounds or more and is in constant motion.
Fan-Rated Box Importance
Ordinary electrical boxes are not designed for the weight or vibration of ceiling fans. Using one is a major safety risk.
Weight support: A fan-rated box is engineered to hold up to 70 pounds, accounting for the additional forces from the fan’s motion.
Vibration resistance: Fan-rated boxes have reinforced mounting points to handle constant vibration, preventing screws from loosening and the fan from wobbling or falling.
For ceiling fan installation, metal boxes are generally preferred over plastic for their superior strength and durability.
Check your existing box for a label stating it’s fan-rated (e.g., “Approved for Ceiling Fans” or “Rated for 70lbs”). If there’s no label, or if the box is flimsy or damaged, you must replace it.
If you’re dealing with flickering lights or frequently tripped breakers, these could be Signs you may need an electrical upgrade beyond just the ceiling box.
How to Replace a Standard Box with a Fan-Rated Box
Replacing a standard box is often the trickiest part of the project but is non-negotiable for safety. The method depends on your home’s construction.
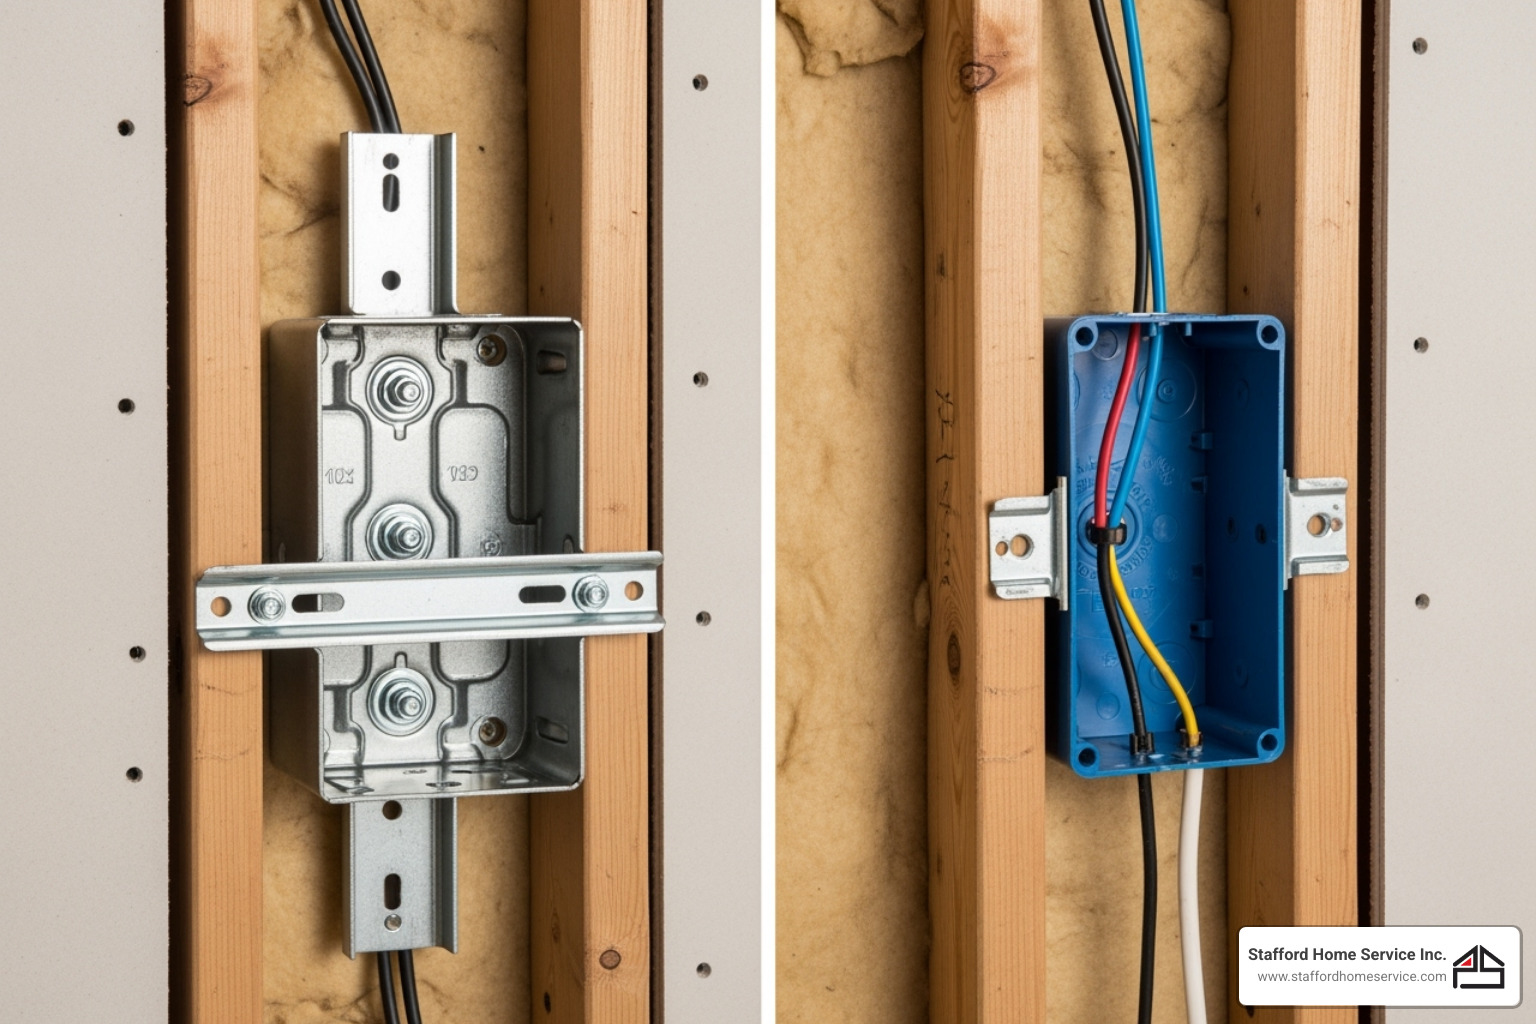
If you have attic access, you can easily secure a new fan-rated box directly to a ceiling joist. The box must be attached to solid wood framing, not just drywall.
Without attic access, use a retrofit brace. This expandable metal bar fits between two ceiling joists, providing a secure mounting point for the new box.
If the fixture is directly under a joist, a shallow, fan-rated pancake box can be mounted directly to the joist.
Securing the new box is critical. Ensure it’s rock-solid, as it will support the fan’s weight and vibration for years. Leave about six inches of electrical wire extending from the new box to provide enough room for connections.
If replacing the box seems daunting, this is a good time to call a professional. Our team handles these upgrades daily, ensuring a safe, code-compliant installation. Learn more about our professional electrical upgrades.
The Main Event: Your Step-by-Step Ceiling Fan Installation Guide
With planning complete, it’s time to install your fan. While models vary, the basic steps are consistent. Most fans require some pre-assembly. Start by assembling the fan motor, threading the wires through the canopy (the decorative cover) and then through the downrod.
For the downrod assembly, screw the pole into the motor base. Pro tip: Use pliers to secure all setscrews and locking mechanisms tightly. This prevents future wobbling. For canopy placement, slide the cover up the downrod. Always follow the manufacturer’s instructions for a successful ceiling fan installation.
Step 1: Mount the Bracket and Hang the Fan
Secure the mounting bracket to the fan-rated electrical box. It must be rock-solid; tighten the screws so the bracket doesn’t move. Most downrod fans have a hanger ball that sits in the mounting bracket, often with a hook to hold the fan while you work on the wiring.
Lock the fan in place by fitting the notch on the hanger ball over the pin in the bracket. This prevents spinning and vibration. Test for stability before moving on.
Step 2: A Guide to Wiring Your Ceiling Fan Installation
Wiring is straightforward: match colors and make secure connections. Double-check that the power is off with your voltage tester.
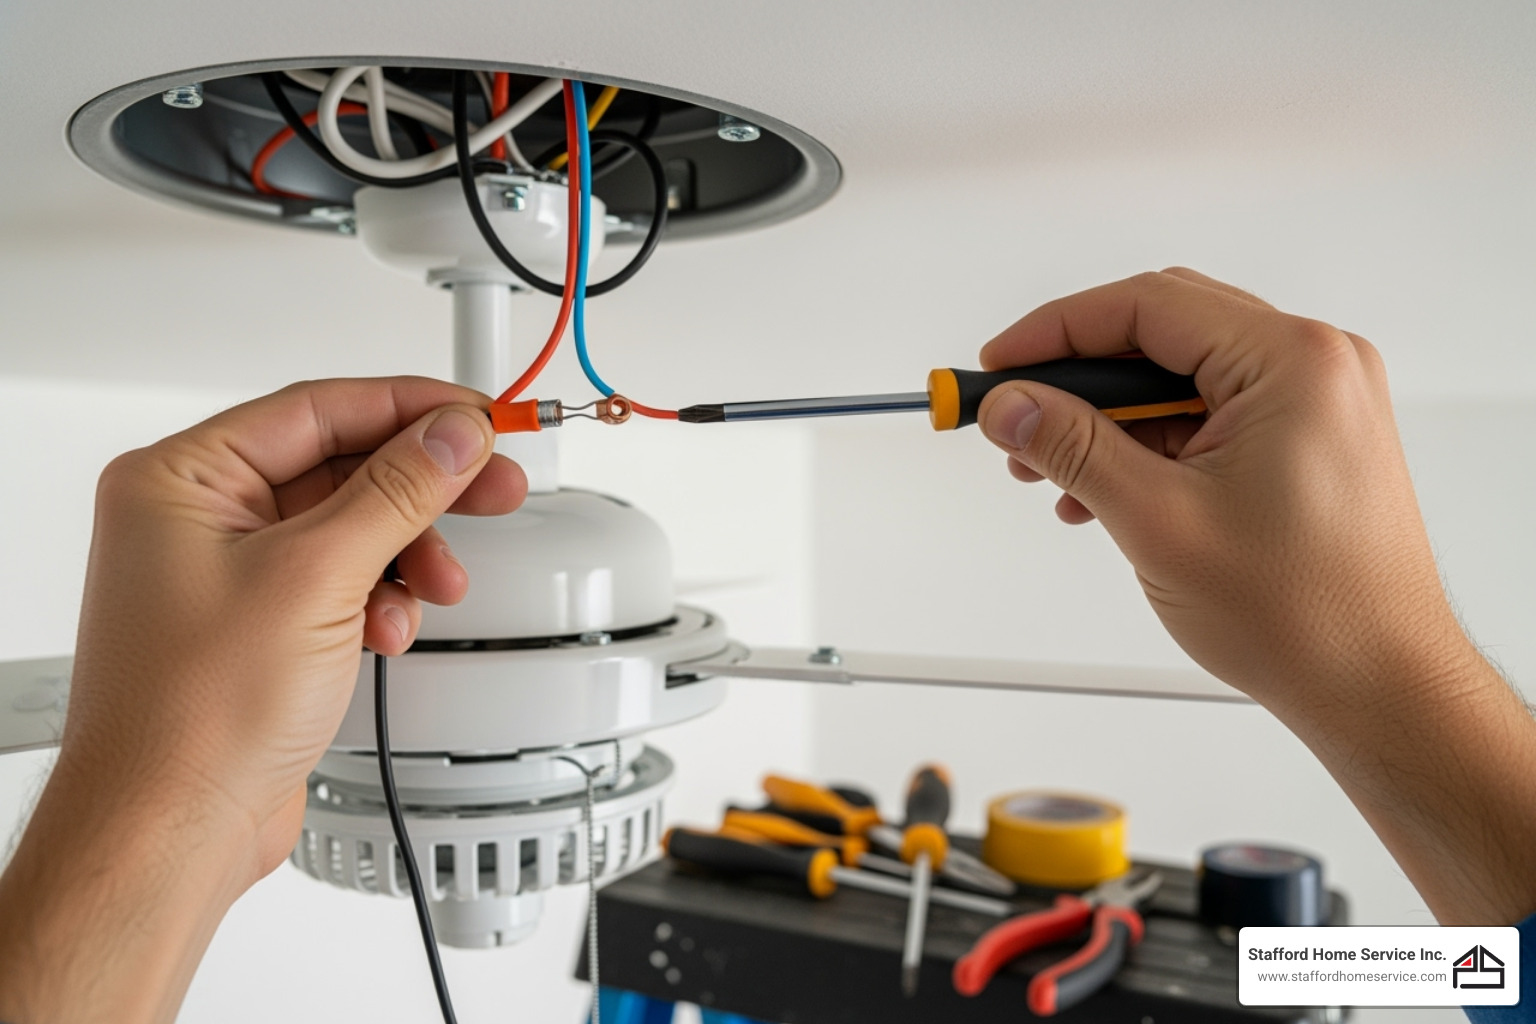
Wire color matching is logical. Connect wires of the same color from the fan and the ceiling.
- Ground wire (green or bare copper) is for safety. Connect the fan’s ground wire to the ground wire from the electrical box. Never skip this.
- Neutral wire (white) connects to white.
- Hot wire (black) connects to black for the motor.
- Light wire (blue or striped) connects to the light control wire. If you don’t have a light kit, cap this wire with a wire nut.
To use wire nuts, twist the bare ends of matching wires together clockwise and screw on the nut until snug. Tuck the wires safely into the electrical box.
Step 3: Final Assembly for Your Ceiling Fan Installation
With the fan hung and wired, it’s time for the final assembly.
Attaching fan blades requires secure connections. Methods vary, so follow manufacturer instructions. Start all screws by hand to prevent cross-threading.
Blade balancing may be necessary if the fan wobbles. Use the included balancing kit (weights and clips) to fix any imbalance. This is a normal part of a quality ceiling fan installation.
Install the light kit by connecting its plug-in harness and securing the fixture. Add shades and bulbs. For a fan without lights, use the no-light cap for a clean finish. Once the blades and any light kit are attached, you can secure the canopy cover over the mounting bracket to complete the installation.
Finishing Touches and Common Troubleshooting
It’s time to test your work. Restore power by flipping the circuit breaker back on. Now, test the fan at all speeds using the wall switch and test the light as well. Listen for any grinding or rattling. A slight hum is normal as the new fan motor breaks in.
Reverse the fan’s direction seasonally to save energy. Use the switch on the motor housing. In summer, set it to counter-clockwise for a cooling downdraft. In winter, switch to clockwise at a low speed to push warm air down.
What to Do When Your New Fan Wobbles, Hums, or Won’t Turn On
If your ceiling fan installation isn’t perfect, don’t panic. Here’s how to troubleshoot common issues:
-
If the fan wobbles, check and tighten all screws on the blades, blade irons, and mounting bracket. A loose screw is a common cause. If it still wobbles, use the balancing kit included with your fan. Follow the instructions to add small weights to the blades until it spins smoothly.
-
Humming or noise can be caused by loose screws or wires rattling against the canopy. A slight hum may also occur during the motor’s break-in period.
-
If the fan won’t turn on, check that the circuit breaker and wall switch are on. Also, ensure the fan’s pull chain is set to an “on” speed.
-
If the light works but the fan doesn’t (or vice versa), recheck the wire connections in the canopy. Ensure the fan (black) and light (blue/striped) wires are connected correctly and the wire nuts are tight.
-
For remote-controlled fans, check the receiver’s wiring and replace the remote’s batteries.
If the fan hums but won’t spin or change speeds, the motor or capacitor may need professional service. For additional troubleshooting guidance, How To Install a Ceiling Fan offers excellent insights. If you’re running into persistent issues, our team specializes in lighting fixture installation and can get everything working perfectly.
Don’t hesitate to call for backup if you’re stuck.
Frequently Asked Questions about Ceiling Fan Installation
Here are answers to common questions about ceiling fan installation.
How long does it take to install a ceiling fan?
Plan on 1 to 3 hours for a typical installation. If you’re replacing an existing fixture with proper wiring, it could take as little as an hour. If you need to replace the electrical box or deal with complex wiring, it will take longer. Prioritize safety over speed, especially if it’s your first time. A helper will make the job faster and safer.
Can I install a ceiling fan on a sloped or vaulted ceiling?
Yes, you can install a fan on a sloped ceiling. Most fans include or can be fitted with an angled mount adapter, which allows the fan to hang level. You will likely need a longer downrod to ensure proper clearance from the floor and ceiling.
Check the fan’s specifications for the maximum slope it can handle (usually up to 34 degrees). Steeper slopes may require special adapters or professional installation.
When should I call a professional electrician?
While DIY is rewarding, sometimes it’s best to call a professional. Here’s when our team at Stafford Home Service Inc. can help:
- No existing wiring: Running new circuits and switches requires a professional to ensure it meets electrical codes.
- Old or confusing wiring: If the wiring is old, non-standard, or looks unsafe, it’s best to call an expert.
- Feeling uncomfortable or unsure: Your safety is the top priority. If you’re not confident, call a pro.
- Outdated electrical systems: A professional can assess if your older system can safely handle the new fan.
- For peace of mind: Our experienced team provides quality workmanship and customer satisfaction, ensuring your fan is installed safely and efficiently.
For new homeowners who are still figuring out their home’s electrical needs, we offer comprehensive electrical services for new homeowners to help you get everything sorted out properly.
Enjoy Your Newfound Comfort
Congratulations on completing your ceiling fan installation! You’ve made a valuable upgrade to your home’s comfort. You safely chose the right fan, installed a proper electrical box, and wired it correctly.
The real payoff is year-round comfort and energy efficiency. Use your fan in summer for a cooling effect and reverse it in winter to circulate warm air that would otherwise get trapped near your ceiling.
Safety reminder: Periodically check that all screws are tight and the fan runs smoothly to prevent future issues.
When to call for help: Contact a professional for persistent wobbling, unusual noises, or any electrical concerns. Sometimes a seemingly simple fix indicates a more complex issue best handled by an expert.
At Stafford Home Service Inc., we applaud successful DIY projects. We’re also here when you need us for a tricky ceiling fan installation or any other electrical, heating, or cooling needs throughout Minneapolis, Edina, Golden Valley, Minnetonka, Plymouth, St Louis Park, and the wider Minnesota area.
Ready for professional installation on your next fan, or need help with any electrical concerns? Contact our expert electrical contractors in Minneapolis for safe and reliable installation – we’re here to help!


