Is It Time for a New Outlet? Prep and Safety First
Electrical outlet installation is a common home improvement task that can save you money and give you the convenience of power exactly where you need it. Whether you’re replacing a worn-out outlet or adding a new one, understanding the process helps you decide if it’s a DIY project or time to call a professional. With proper preparation and attention to safety, many homeowners can successfully tackle basic outlet replacements, though more complex installations often require professional expertise.
Quick Answer for Electrical Outlet Installation:
- Turn off power at the circuit breaker
- Test for power using a voltage tester
- Remove old outlet (for replacements) or cut opening (for new installs)
- Connect wires – black to brass (hot), white to silver (neutral), ground to green
- Secure outlet in the box and attach cover plate
- Restore power and test the outlet
Most outlets last 5-15 years with frequent use, though rarely used ones can last up to 30 years. GFCI outlets typically last 15-25 years but need regular testing for safety. The lifespan of an outlet depends on several factors including the quality of the initial installation, the frequency of use, the types of devices plugged into them, and environmental conditions like humidity and temperature fluctuations. Heavy-use outlets in kitchens and home offices tend to wear out faster than those in guest bedrooms or hallways.
You’ll know it’s time for a replacement when you see warning signs like cracked faceplates, scorch marks, loose plugs that won’t stay in, or outlets that feel hot to the touch. These issues aren’t just inconvenient – they’re fire hazards that need immediate attention. Additionally, if you’re experiencing frequent circuit breaker trips when using certain outlets, or if you notice a burning smell near an outlet even when nothing is plugged in, these are critical warning signs that require immediate action.
The good news? With the right tools, materials, and safety precautions, outlet installation is manageable for many homeowners. The key is knowing when to tackle it yourself and when to call in the experts. Simple replacements where existing wiring is in good condition and properly sized for the circuit are often DIY-friendly projects. However, adding new circuits, dealing with aluminum wiring, or working in older homes with outdated electrical systems typically requires professional intervention. For authoritative safety guidance, review OSHA’s overview of electrical safety standards at OSHA Electrical.
Before beginning any electrical work, understand your local building codes and permit requirements. Many jurisdictions require permits for electrical work, even for simple outlet replacements. While this might seem like an unnecessary hassle, permits ensure that work is done safely and up to code, protecting both your family and your home’s value. Insurance companies may also deny claims for electrical fires if unpermitted work is finded.
Know the Warning Signs
Our homes are full of silent signals, and when it comes to electrical outlets, those signals can be loud and clear if you know what to look for. Ignoring these signs isn’t just about inconvenience; it’s about safety. Regular inspection of your outlets should be part of your home maintenance routine, just like checking smoke detectors or changing HVAC filters. Here are the key indicators that an electrical outlet installation or replacement is due:
-
Cracked Faceplate: This might seem minor, but a cracked or damaged faceplate can’t keep debris out. This debris poses a hazard to the outlet itself, potentially leading to short circuits or other issues. It’s like a tiny crack in a dam – eventually, the problem will breach. Cracks also expose the internal components to moisture, which can cause corrosion and increase the risk of electrical shock. Even hairline cracks should be taken seriously, as they tend to worsen over time with temperature changes and regular use.
-
Scorch Marks, Discoloration, or Melted Areas: If you see any signs of burning, like black marks, discoloration, or melted plastic around your outlet, stop using it immediately! These are serious warning signs of a potential spark or short-circuit, often due to moisture leakage or an overloaded circuit. Never use burnt outlets! Call for emergency electrical repairs instead. This is not a DIY fix; it requires professional attention to ensure your home’s safety. Scorch marks indicate that arcing has occurred, which means electricity has jumped through the air between connections, creating intense heat that can ignite surrounding materials.
-
Loose Plugs or Wobbly Connections: Do your plugs fall out easily? Does the outlet feel loose or wobbly when you try to plug something in? This can happen with heavy use, pushing the outlet too deeply into the wall. A loose connection can interrupt the flow of electricity, creating an electric arc. An electric arc is essentially a small lightning bolt, and it can put your home at significant risk for a fire. The internal contacts in outlets wear down over time, especially if you frequently plug and unplug devices. This wear creates gaps that increase electrical resistance, generating heat and potentially causing fires.
-
Flickering Lights: While you might blame the lightbulb, flickering lighting is rarely caused by the bulb itself. Instead, it’s often a sign of an underpowered electrical system or a problem with the circuit, which could stem from a faulty outlet. If your lights are dimming or flickering, it’s a call for investigation. This symptom often indicates loose wiring connections, either at the outlet itself or somewhere else in the circuit. It could also suggest that the circuit is overloaded and struggling to provide adequate power to all connected devices.
-
Outlet Feels Hot to the Touch: An outlet feeling warm or hot when nothing is plugged in, or when a device is plugged in, is a major red flag. This indicates a potential spark or short-circuit within the outlet itself. If an outlet is hot, it means something is wrong, and it’s a fire hazard that needs immediate attention. Heat generation in outlets typically results from excessive electrical resistance due to loose connections, undersized wiring, or damaged internal components. Even slight warmth should be investigated, as it can quickly escalate to dangerous temperatures.
-
Outlet is Not Working: This might seem obvious, but if an outlet has stopped working (or perhaps never worked), it could be a simple tripped breaker, or it could be a symptom of a larger underlying electrical issue. Always check your circuit breakers first, but if the problem persists, it’s time to investigate further. Dead outlets can result from various issues including broken internal connections, damaged wiring, tripped GFCI outlets upstream in the circuit, or problems at the electrical panel. For more detailed information on troubleshooting dead outlets, you can visit our guide on More info about resolving dead electrical outlets.
-
Buzzing or Crackling Sounds: Any unusual sounds coming from an outlet should never be ignored. Buzzing typically indicates loose wiring or a faulty breaker, while crackling sounds often mean arcing is occurring. These sounds may be intermittent, occurring only when devices are plugged in or when the circuit is under load. If you hear these sounds, discontinue use immediately and have the outlet inspected by a professional.
Choosing the Right Outlet Type
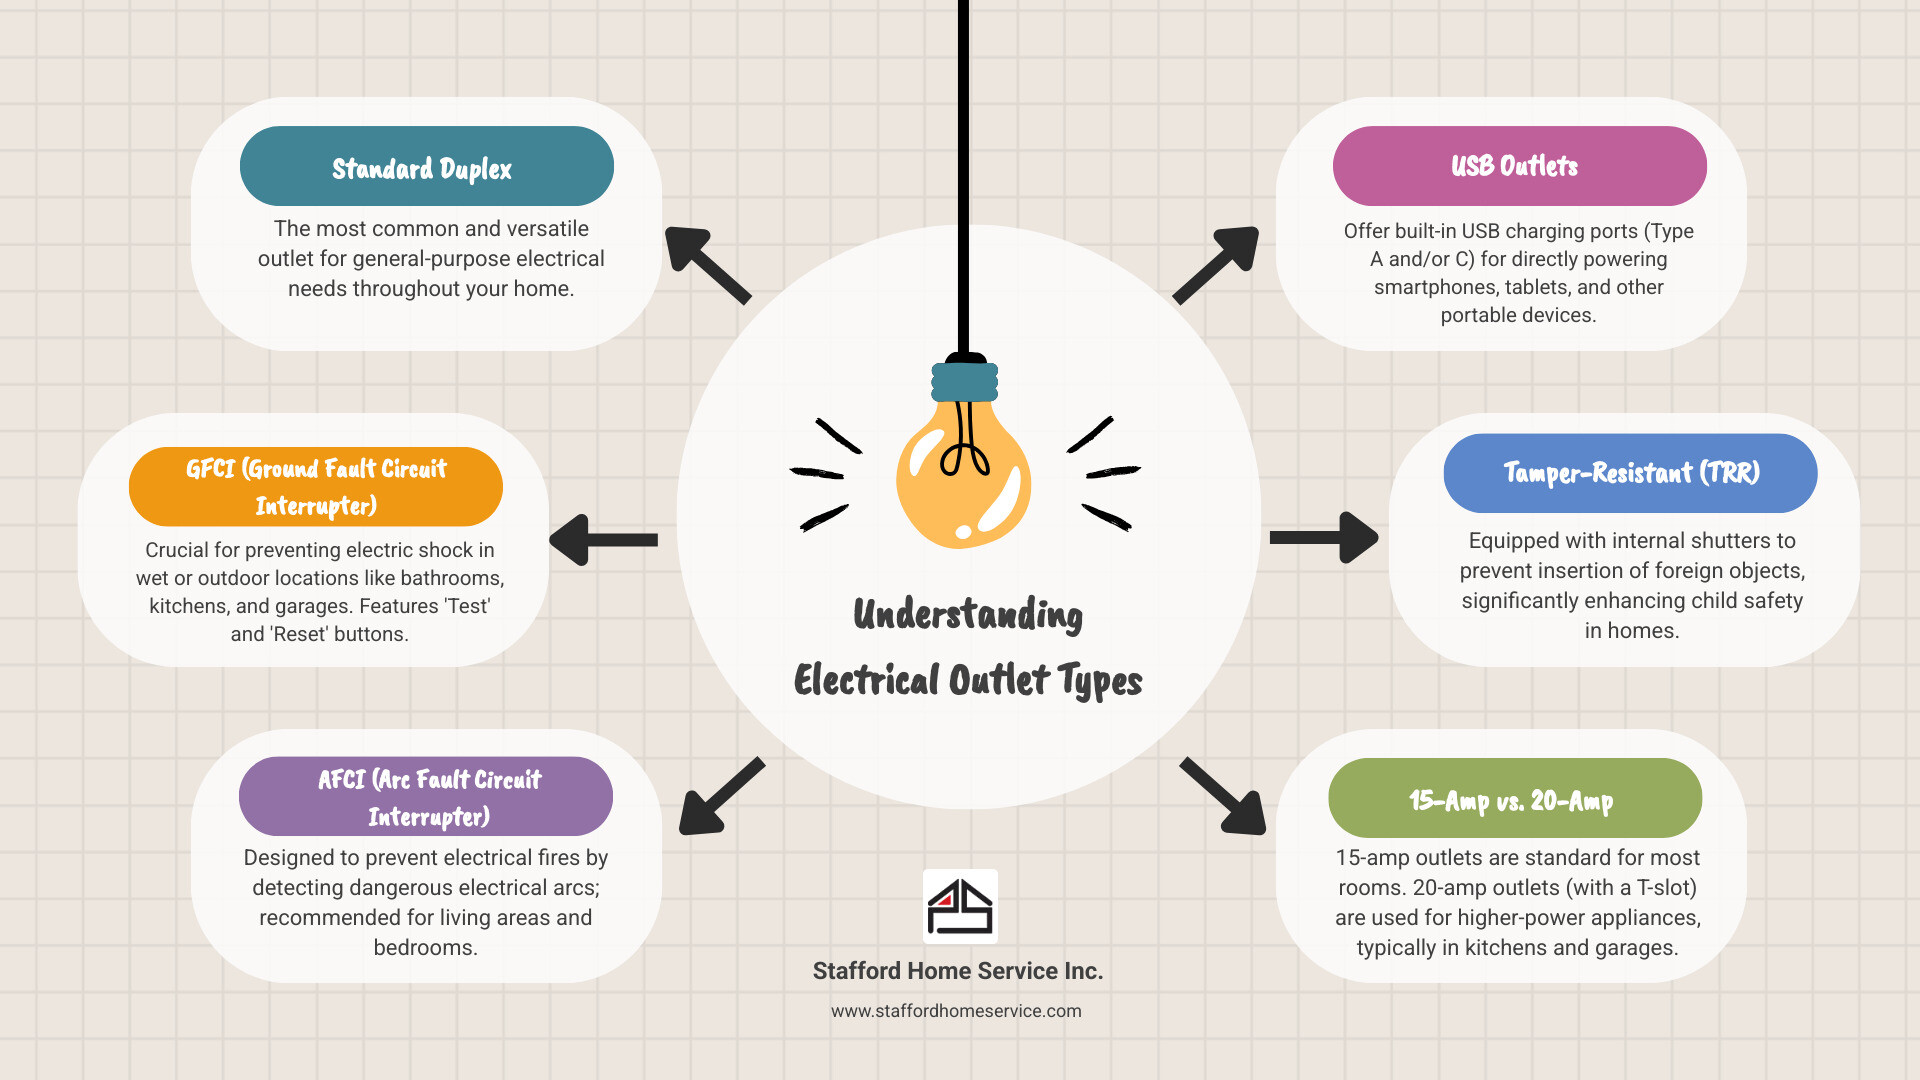
When it comes to electrical outlet installation, it’s not a one-size-fits-all world. Different outlets serve different purposes, and choosing the right one is crucial for both safety and functionality. Modern building codes have specific requirements for outlet types in different locations, and understanding these requirements helps ensure your installation is both safe and compliant. Let’s break down the most common types you’ll encounter:
| Outlet Type | Primary Use | Benefits | Typical Cost Range |
|---|---|---|---|
| Standard duplex (15A) | General use in living areas, bedrooms, halls | Affordable, widely compatible with most devices | $3-10 per outlet |
| GFCI | Kitchens, bathrooms, garages, outdoors (wet or damp locations) | Protects from ground faults; required by code in wet areas; has test/reset buttons | $15-25 per outlet |
| AFCI | Bedrooms and many living areas | Helps prevent fires from arc faults; often required by code in living spaces | $20-30 per outlet |
| USB/USB-C combo | Any room where charging is common | Built-in charging without wall warts; frees up receptacle slots | $20-40 per outlet |
Also consider Tamper-Resistant Receptacles (TRRs) for child safety; they feature internal shutters that block foreign objects. These outlets are now required by code in most new construction and renovations. The shutters only open when equal pressure is applied to both slots simultaneously, as happens when plugging in a device. This prevents children from inserting objects into the outlet, significantly reducing the risk of electrical shock. Learn more from the NFPA: Tamper-resistant electrical receptacles.
When selecting outlets, also consider the amperage rating. While 15-amp outlets are standard for most residential applications, 20-amp outlets are required for certain high-draw appliances and are common in kitchens, garages, and workshops. The outlet amperage must match the circuit breaker and wire gauge to ensure safe operation. Using a 20-amp outlet on a 15-amp circuit won’t provide any benefit and could create confusion about the circuit’s actual capacity.
Specialty outlets are also available for specific applications. Weather-resistant outlets are designed for outdoor use and feature additional sealing to prevent moisture intrusion. Hospital-grade outlets provide a more secure connection and are built to higher standards for reliability. Smart outlets allow remote control and scheduling through smartphone apps, adding convenience and energy-saving capabilities to your electrical system.


